Loveday Crewelwork: Blackbird begun!
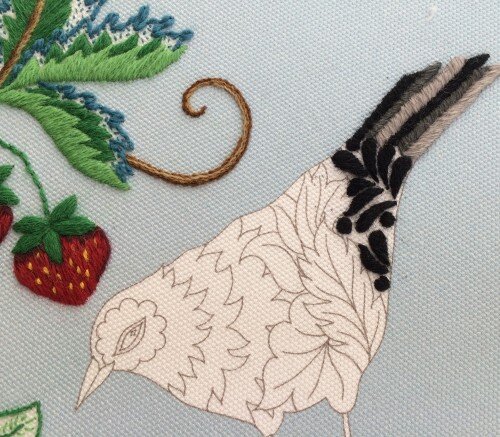
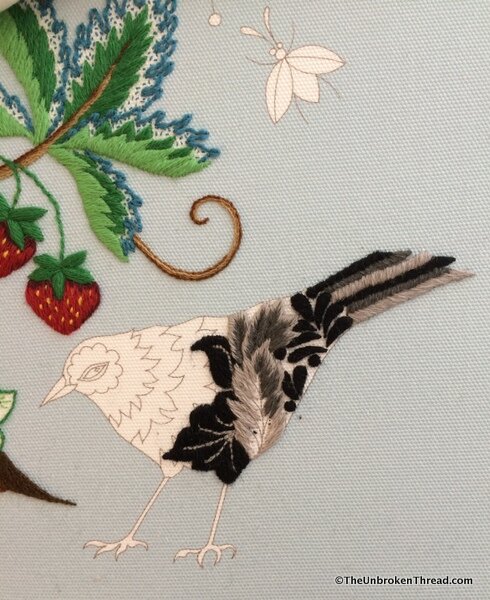
Now that I'm finished embroidering the trunk, strawberries and leaves of the lower part of the design, I decided to stitch both the blackbird and the sparrow. Nicola is renowned for her bird designs and I've stitched the Bluebird crewelwork design before but not the blackbird or the sparrow. I was looking forward to embroidering both of these darling, little bids I chose to begin with the blackbird. Following the rule of beginning with the element of the design that's in the background, I first stitched the tail feathers using a diagonal satin stitch. That really didn't take long, so I moved on to the leaf shapes within the blackbird at the back. Each of these little shapes I outlined with split stitch before working satin stitch on an angle across the leaf shape.
 Again, it didn't take long as the area is small. I was making progress! Then I looked down at the fabric and saw loads of black fuzz. Well, I've not stitched with black wool before so I was surprised to see so much black fuzz on the fabric! Black really shows up - especially on light blue fabric and for one horrifying split second I thought it was dirt!Fortunately, I had my defuzzing brush at hand! What, I hear you ask, is a defuzzing brush? Simply a soft, new baby's hair brush. One or two gentle swipes with the brush across the area removes all of the fuzz and fluff and doesn't damage the wool in the slightest! If you are thinking of getting one, it doesn't have to be expensive - mine comes from Boots, the biggest pharmacy in the UK. It wasn't expensive and is perfectly adequate for the task.
 Next up were the feathers worked in long and short stitch. These feathers are relatively small in size so, again, it went very quickly! The feather farthest in the background is the small one at the top, followed by the middle sized one next to it and then the largest at the bottom. I outlined all three with split stitch and then completed the entire feather before moving on to the next one.The last section to do that day were the two all-black feathers which are all satin stitch. The area to be stitched is large enough that I drew pencil lines to ensure that my satin stitches were straight and parallel with one another over the entire shape. I find this helps a lot when there are breaks in the shape - the veins in this example - that might cause you to make one stitch angle slightly. One stitch at an angle usually turns into the subsequent stitch getting more angled until you have slanted satin stitches where you wanted straight ones!Next time, you'll see the pretty-much finished blackbird and I'll explain what is left to do and why I haven't done it yet.Have you ever stitched with black wool? Did it leave fuzz everywhere? What was your solution?
