Assembly of Trevelyon's Pocket - Yikes!
Nothing makes me more nervous than cutting into a piece of finished embroidery. Nothing. I'm confident that the stitching will stay in place as long as the fabric doesn't somehow spontaneously come unraveled as I work with it. I know in my brain the fabric will be fine but, still, I get nervous. Do you?To make sure that I work with the embroidered piece as little as possible when I'm constructing something like Trevelyon's Cap or a needle case or this pocket, I make a paper copy of the piece first then do all my folding and planning using the paper piece.It's pretty easy to make a photo copy of a piece of embroidery. Below is the photocopy of the pocket measured to determine where the edge of the fabric needs to be to construct the pocket correctly. After I made the photocopy, I cut the copy to the size of the eventual finished size of the pocket.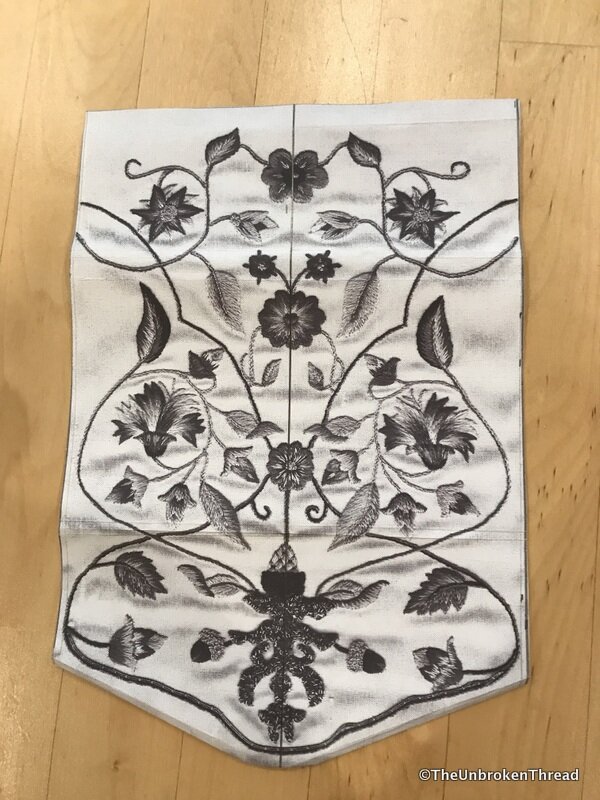 Then I played with the paper copy to determine where to fold the fabric to make sure the embroidery would line up nicely when the pocket was folded into thirds, as it will be when finished. I wanted the gold "clasp" to line up, so the two complete flowers and the two buds on the outside were showing when the flap was closed. It took a few tries, but I got it pretty quickly.
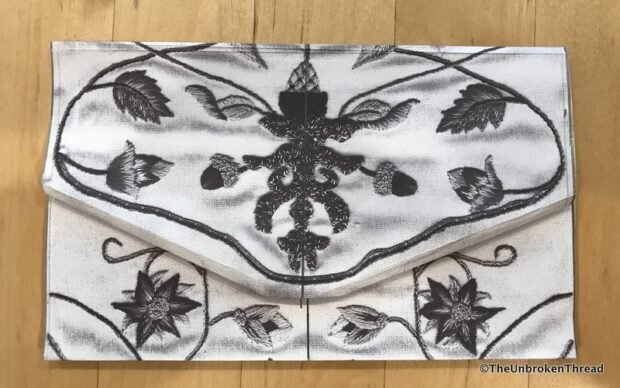 I also wanted the back to be a cohesive group of flowers and leaves. This proved to be easy; when the flap on the front was right, the back was also right. Guess Trevelyon knew what he was doing when he drew the pattern!
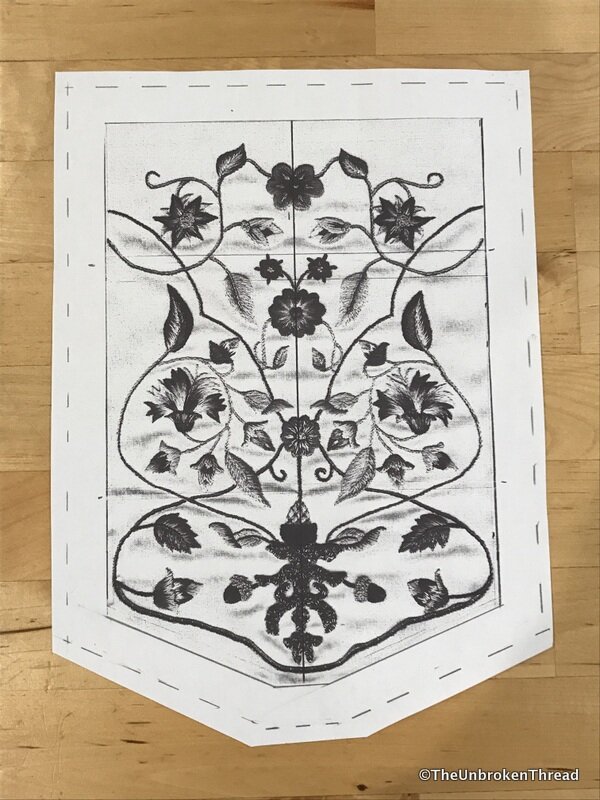
 Now that I figured out where the finished edge would be and how to fold the pocket, I made another copy. This copy allowed me to draw the outline of the finished shape. This is important because if/when I teach Trevelyon's Pocket as a class, students need a pattern from which to work. I added seam allowance as well. The dashed lines are where the fabric will be CUT. The solid lines are where it will be SEWN.
 Next I had to figure out how to use the paper pattern as a guide for cutting the embroidered fabric. I put the paper pattern behind the embroidered fabric both against a window and over my light box but the embroidered fabric is too thick for the pattern to show through!
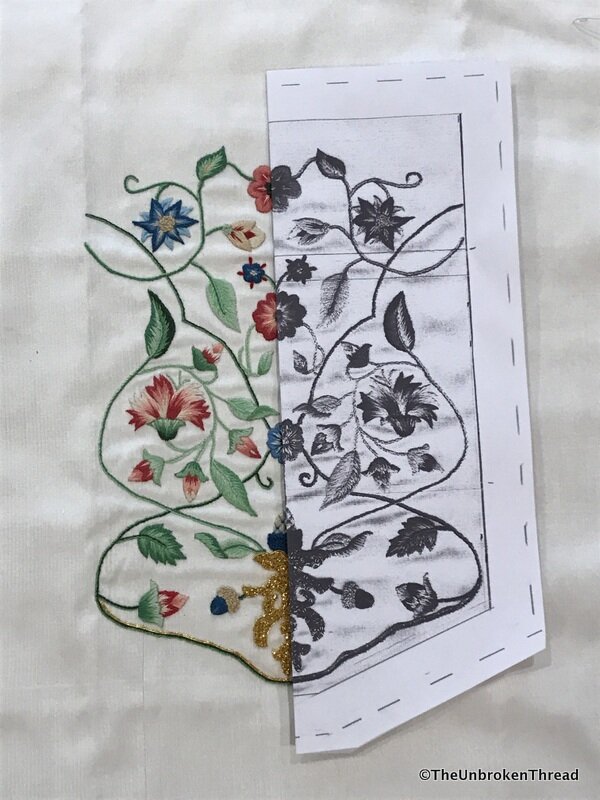 So I decided to use the mirror image method. Folding the paper pattern exactly in half along the center line, it was simple to line up the center of the pattern with the center of the embroidered fabric. Using a clear ruler, I could draw the lines onto the fabric, which would become my cutting lines.
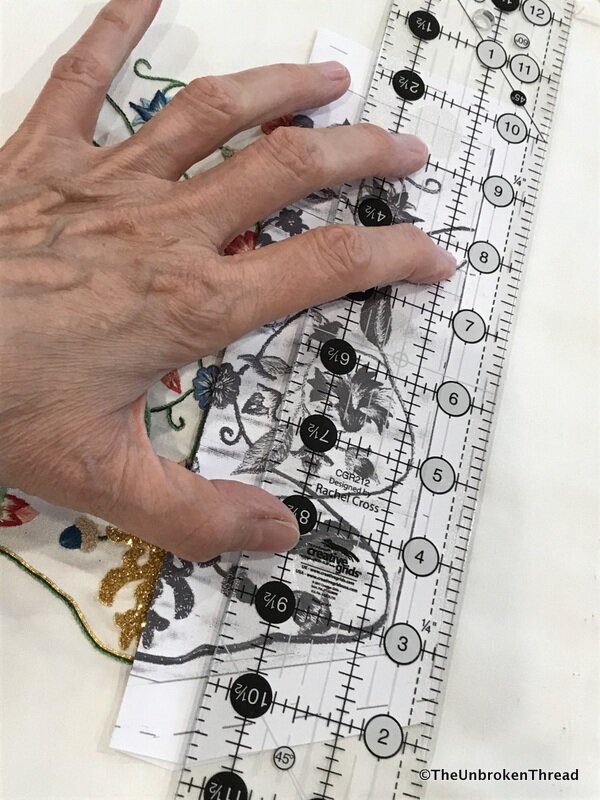 Once that was finished, I knew exactly where to cut to give myself enough seam allowance for assembling the pocket. I didn't draw the seam allowance lines. The pocket will be assembled by hand because flexibility will be important to ensure it comes together smoothly.
 The silk did fray a tiny bit as I cut it, but not enough to make me worried. One could use a product like Fray Check, but I wouldn't since we don't know what the long lasting effects of that would be on the fabric.
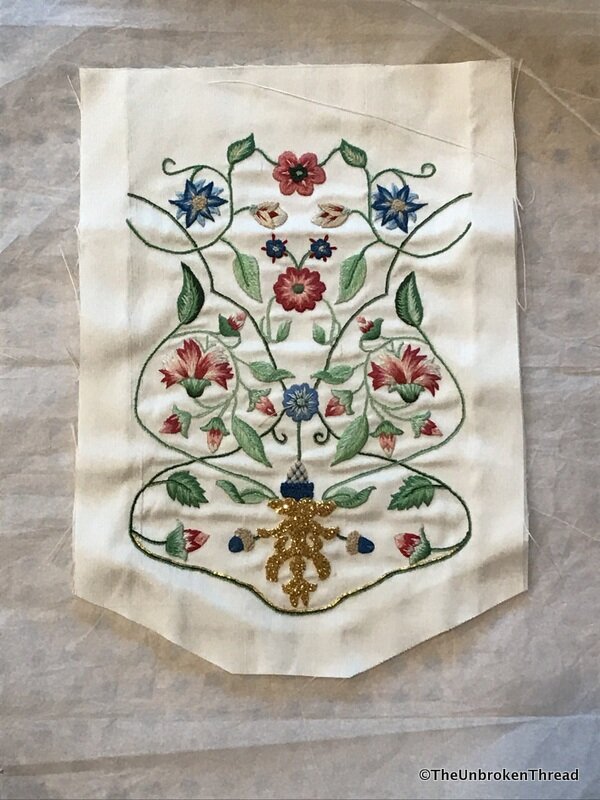 Once that was all finished, my mind jumped ahead to the lining color. My Trevelyon's Cap is lined in green silk and I was hopeful that there was more of the same green silk in my fabric drawers. There was! I love the green against the flowers and leaves and think it will be beautiful to peek inside the pocket and see the deep, glowing green silk.
 Next time I'll have assembled the pocket and will share with you some of the details of how I did that. I have a plan...
