RSN Goldwork Day 4: Pearl Purl
Pearl purl is one of my favorite threads to use in metal thread work. I like how stiff it is, how easily it will curve to the shape and even bend where you want it to. It doesn't split or fray, although it can bruise if you aren't careful. It is also just beautiful when it's applied - just like little golden pearly drops of loveliness!For the crosier, I used pearl purl in five places: on the outside of the crosier, around the edge of the vine leaf, as the veins of the long leaf, for the stem of the vine leaf and for the curlicue. I used two sizes -#1 fine and #2. The larger the number, the larger the pearl purl. Pearl purl is made by wrapping thin metal wire - either gilt or plated with 2% gold - in a tightly wound spring. In fact, when you get pearl purl out of the package it's springy and flips and flops all over the place! It's as if it has a life of its own!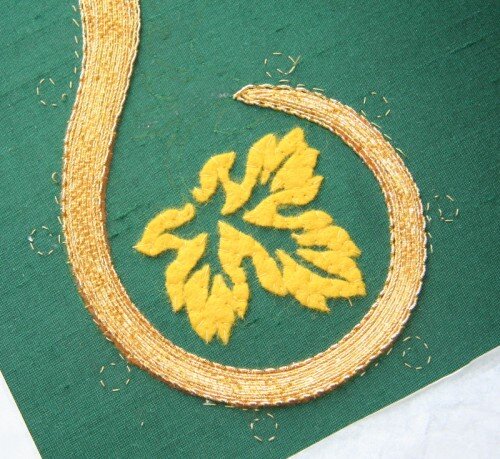 Prior to couching down the pearl purl #2 on the outside of the crosier, I stitched the curled shapes onto the silk with tiny stitches to help me couch the pearl purl in the right place. (See photo above) Since the thread is fine, painting the curls on with water color felt a bit risky so I decided to use this method of transferring the design.The first thing I did before couching the pearl purl to the silk was to gently, slightly, barely stretch the pearl purl. Holding on to the end of the length of the thread with my fingernails, I pulled it slightly apart and let it spring back. This separates the individual pearls and also takes away some of the springiness. It was easier to do this with the #2 than the #1 just because the #1 is so fine it was hard to hold on to and tricky to see. In fact, I found the #1 pearl purl tricky to see whenever I was working with it, even using my magnifying lamp. Either I need new glasses or I need to accept that it is a small thread and the way I'm seeing it is good enough to work. Sometimes I think I get so used to seeing everything magnified that my eyes are lazy.
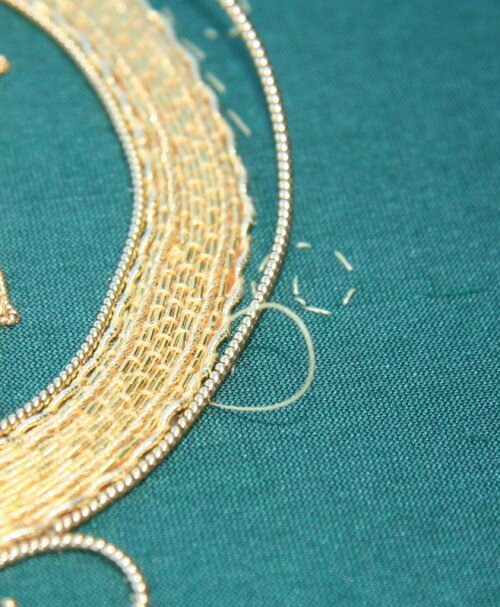 Pearl purl is attached to the fabric by bringing the needle up on the inside of the thread, over the thread at a very slight angle so the thread will slide gently into the grove between two pearls and taking the needle through to the back on the outside of the pearl purl. The thread is a single thread and is always waxed lightly to give it strength and keep it from getting tangled as you stitch. This process is the same regardless of what size you're using. It's usually enough to put a stitch in every 3 or 4 pearls unless you're going around a tight curve and then an extra will help hold it in place. The thread should disappear down between each of the pearls and not be seen.Before the edges of the crosier were finished, however, I needed to outline the vine leaf in #1 fine pearl purl..
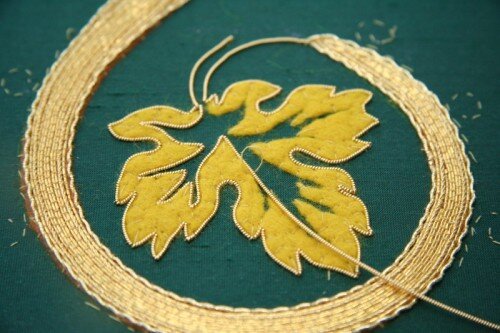 The leaf is a very intricate shape and my goal was to outline the whole shape using only two threads - one for the outside outline and one for the inside outline. The center of the leaf will be filled with chip work. (Coming soon!)When outlining the leaf I discovered that the thread could be very slightly coaxed into the curves as I was working and that the couching stitches would hold the pearl purl in place. When it came to the tiny points both inside and outside the leaf shape, I used the sewing thread to hold the pearl purl in place as I gently bent it into the sharp angle.
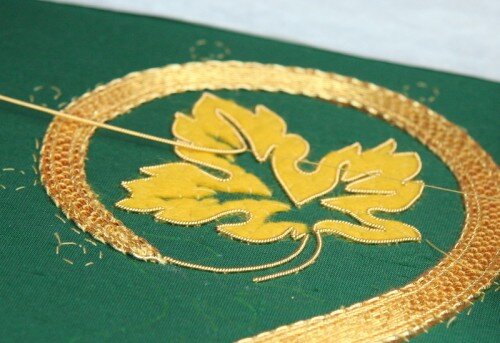 Once I was around the corner with one or two couching stitches, I then used my tweezers to pinch ever so gently the tip into a point. This is where care and a slow steady hand help as pinching it too fast or too hard will smash or bruise the pearl purl and no amount of coaxing will return it to its shape.
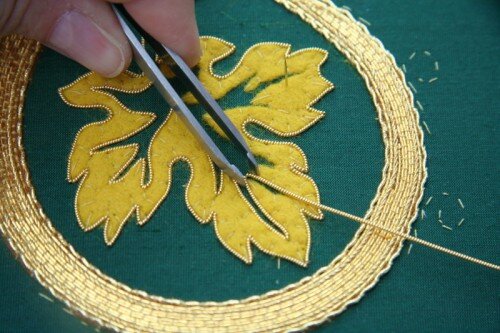 I found it much easier to pinch the #1 fine pearl purl into a sharp point than I did the #2 just because the pearls on the #2 are larger. It was possible but the point was super sharp.The other way I used pearl purl was to overstretch it and couch it down to make the veins in the long leaf at the bottom of the crosier. To do this I stretched the pearl purl more so that the pearls stayed separated creating a wavy texture. I then couched down the thread at each valley. These couching stitches were visible so I was careful to stitch them neatly and at the same angle.
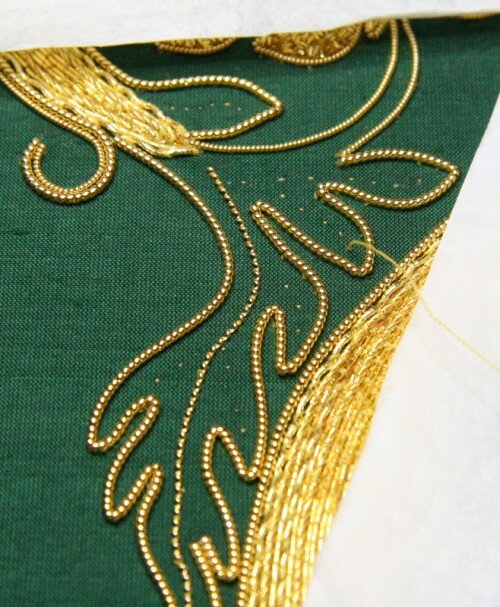 I used the same technique of putting in tiny stitches to guide me as I couched the overstretched pearl purl for the veins in the leaves. The veins begin and end without touching the outline of the leaves so they look less heavy.
 There were two changes to the original stitching plan that I made as I was working on the pearl purl. The first was to work two strands for the curls on the edge of the crosier. I initially worked only one in #2 pearl purl but it was too thin and flimsy looking against the weight of the crosier. I decided to add an line of #1 fine pearl purl on the outside and am really pleased with the change and how it looks.
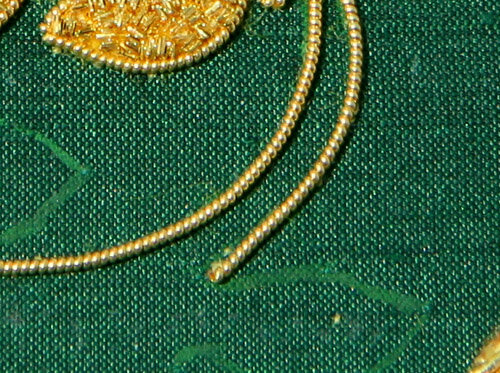 The second was to fill in the stem of the vine leaf. Originally it was outlined but after putting in all the chip work, it again didn't have enough weight in comparison to the leaf so I added #1 fine pearl purl to fill in the center.
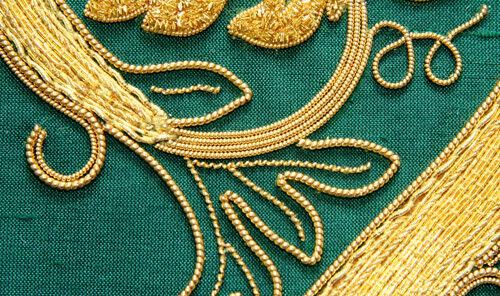 What I loved most about working with pearl purl was the challenge of using a single strand for as much of the line as possible. If you look at the curlicue in the top right of the photo above, you can see that the loops are each one piece and only the tail is an added piece. It's a fun, sculptural thread to use and when two sizes are combined it looks fabulous.What's your favorite thing about pearl purl? If you haven't used it yet, what's your favorite bit in the photo above?
