Bullion knot flowers
Ever since I found out that milliners needles made bullion knots really easy to do, I have loved doing them. Before I made that discovery, I dreaded them. Bullion knots were difficult, messy and usually had to be done at least more than once. Now that I know which needle to use, they're a piece of cake!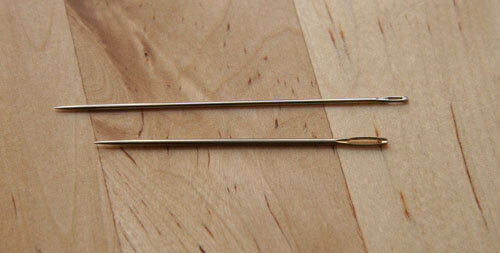 What's the difference between a milliner's needle and another needle? Most of the other needles we use to embroider are tapered; a bit wider at the eye end of the needle and getting narrower towards the point end of the needle. Milliners needles are the same thickness from the eye to just before the tip.The package of milliners needles I have contains needles from size 3 - 9. The one you see in the photo above is a size 9. I chose it for these bullion knots because I'm using wool, which is thicker. If I was using silk I would chose a much smaller size.
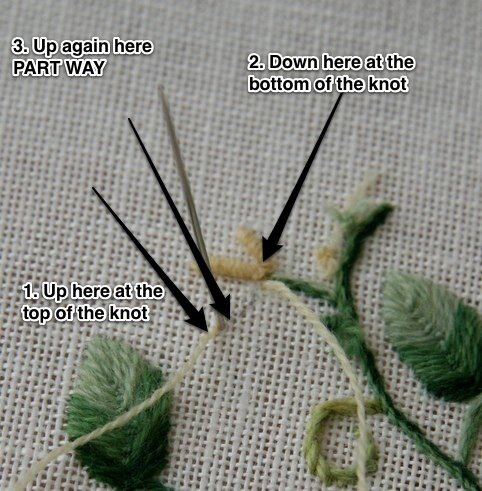
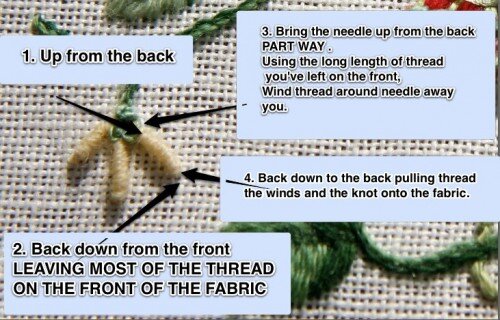
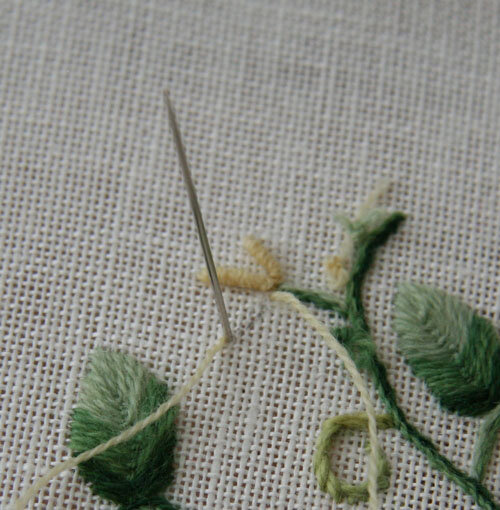 To make a perfect bullion knot every time, bring your thread up at the point where the "top" of the knot will be if you're working petals of a flower, as I did here. If the knots will be horizontal, bring your thread up from the back at one end of where the bullion knot will lay. Now put the needle through to the back at the "bottom" or other side of where the bullion knot will lay. LEAVE MOST OF THE THREAD ON THE TOP SIDE OF YOUR FABRIC.Next, bring the needle PART WAY up again at the "top of the bullion knots. DO NOT BRING IT ALL THE WAY THROUGH THE FABRIC AT THIS POINT. The thread you have left on the top of the fabric is the thread that will create the knot. You wind it to make the knot and it's also the base for sliding the wound thread onto to make the knot. The needle that's only part way through the fabric is the form for the knot - you'll make the twists on the needle and then slide them onto the thread.
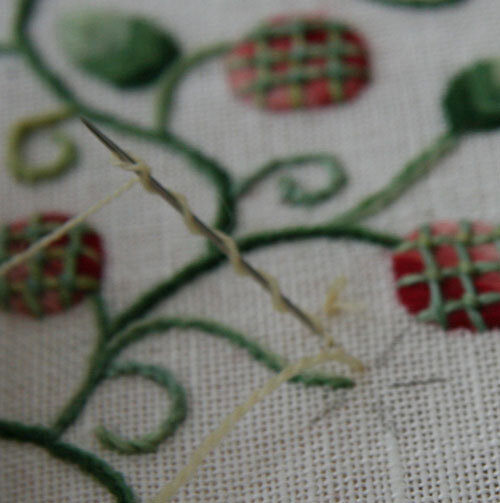
 Next take all that lovely thread you've left on the top in your non-stitching hand. Holding the needle, wind the thread away from you around the needle. You will need to judge how many winds you need to make the knot the length you want it to be; 2-4 for a small one, up to 8 or 9 for a long one like these petals. After you're done winding, roll the twisted thread gently between your thumb and finger to even out the twists. Often the last twists will be pulled much tighter than the first twists, making the knot uneven. If the twists have overlapped (as they have below) rolling them will smooth them out too.
 Now you will gently, smoothly, slowly pull the needle up, all the way through the fabric and put in through the "bottom hole" again, to the back of the fabric. Gently hold the wound thread in place as the needle and then the thread slides through. As you do this, the wound thread will slide onto the piece of thread that you left on the top of the fabric. As the needle goes back through to the back, pulling all the thread with it, the knot will glide down and settle beautifully onto the fabric in a perfect little bullion knot.To recap:
 Coming soon, the finished cover for the little needle book and putting it all together!