Gold work lesson 1
In England, I was fortunate enough to have two private lessons with Nicola Jarvis on goldwork techniques. These few days have helped clarify some things and teach me others that I didn't know. Often I learn from a book or a web site how to do certain techniques and more often than not the instruction is fine. Gold work, though, is an expensive technique to get wrong and I wanted some additional teaching before I begin my course this summer in Rugby. We worked in the conservatory which is serving as a temporary studio space and it was just lovely. The only difficulty was keeping my eyes on the stitching and not on the beautiful garden beyond. You can see my Needle Needs frame and stand on the loveseat, waiting for me to assemble it.The first task was to attach the silk fabric to the calico. This is done to give the silk body and help it hold the weight of the gold. Using alternating long and short single stitches, I worked from the middle to one corner along the top. Then I returned to the top middle and stitched to the opposite corner. I repeated this on all four sides so the silk was as flat on the calico as I could make it.
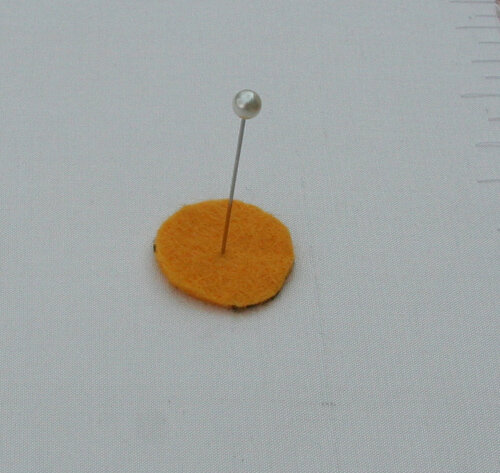
 We started with padded shapes - a circle and a long, narrow leaf shape. To create the padding, I cut out three sizes of each shape. For the circle, I cut out a large, a medium and a small circle of yellow felt. I did the same for the leaf shape. Putting the smallest felt circle on the fabric first, followed by the medium and then the largest circle, I held them in place with a straight pin right in the middle of the circle.
 Then it was time to tack the circle to the silk mounted calico. The first stitch went in at 12:00 on the circle. The second at 6:00, the third at 3:00 and the fourth at 9:00. Again, this is to make sure everything is as flat and stable as possible.
 Now it was finally time to use the gold thread! The preparation for goldwork is very important so taking time to get it right is never wasted.
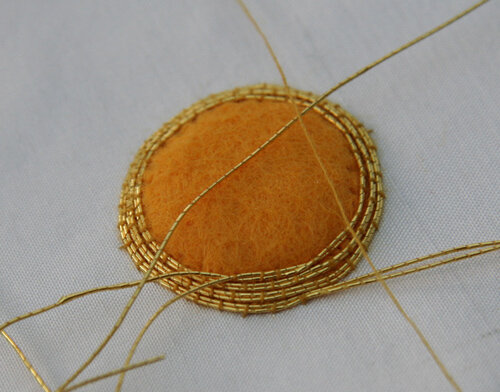
 Using two parallel threads, I couched down each row slowly and carefully. The first row is worked with the needle coming up at the bottom of the gold thread and all the rows after the needle comes up at the top of the row. One good way to remember this is "gold next to gold". The needle goes through to the back between an already stitched row and a newly stitched row.
 Two things were a little tricky for me: firstly, getting the rows of gold close enough together so there weren't any gaps and secondly, keeping the two threads flat next to one another. In the photo above you can see that the rows are better spaced on the left than on the right. You can also see that the threads are twisted right in the middle of the top row.One of the most relaxing things about this lesson with Nicola was that I was truly doing a learning sampler. This is the first time I've just done stitching to learn, without any idea of a completed piece at the end. I have a lot to learn and practice before I'll feel as confident as I do in crewel work techniques. It was a great first lesson!Which technique do you feel most confident in? Which one needs more practice?
