This is just all wrong...
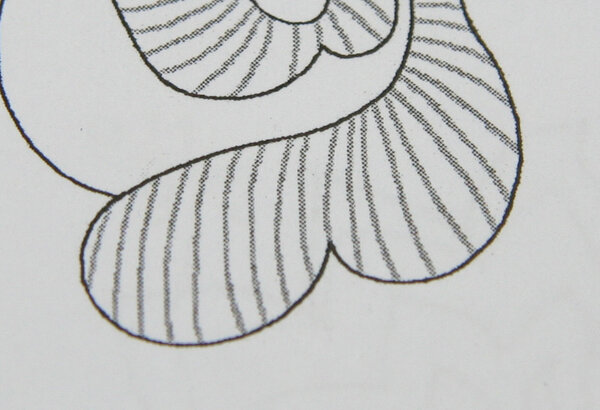
Most of yesterday afternoon was spent working on the "Spray Stem Leaf" section of the Royal Persian Blossom project. I was apprehensive about this area for two reasons: firstly, it is my least favorite part of the design (the shading looks awkward) and I wasn't sure how to tackle long and short shading in such an unusual shape.I spent about 30 minutes looking at the instructions and the photograph of the finished piece both online and in the photo included with the design. I studied carefully the stitch diagrams and sorted my thread so I was prepared. Then I began.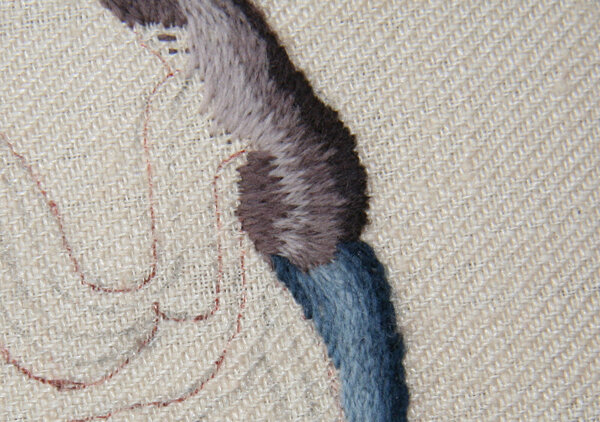 The first part went pretty well. The shading is fine and, although the colors I've chosen are slightly different from the original, my effort looks pretty similar to the photo.Then I began on the bottom section and things started to go wrong.Here are the stitch diagrams - both color placement and stitch direction - that are part of the instructions.
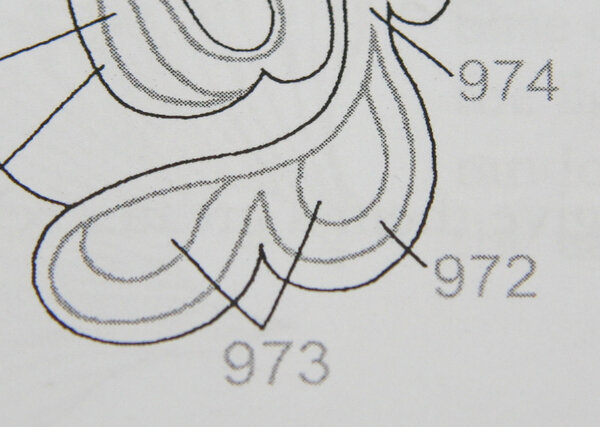
Color placement within the shape: 974 is the darkest shade, 973 the middle and 972 the lightest shade.
Long and short stitch direction and curve.
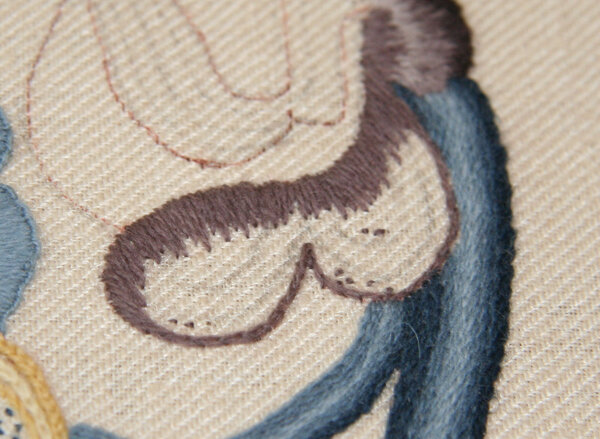
Below you can see that I've carefully marked the area I'm going to stitch with long and short shading so I'm sure about the general areas of color. You can also see that I've followed the direction and curve as indicated in the instructions - except at the very end where I've curved it down a bit.
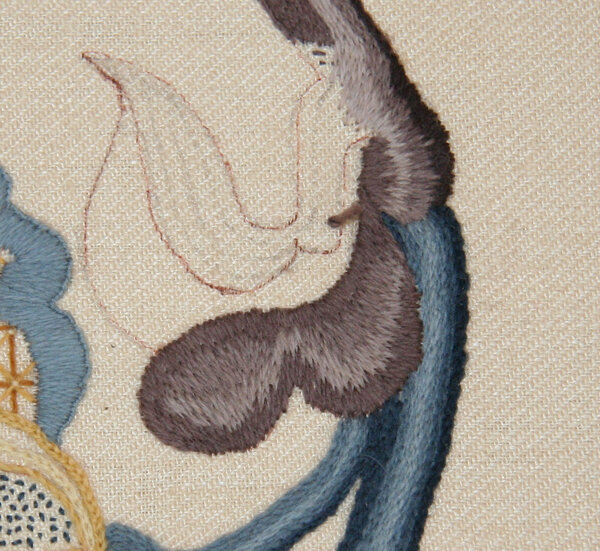
When I began I was feeling pretty confident. I had the diagrams and had carefully drawn in the areas of color. My long and short shading is getting better so I thought I would be fine. Ha! No such luck! Here's what it looked like when I was finished.
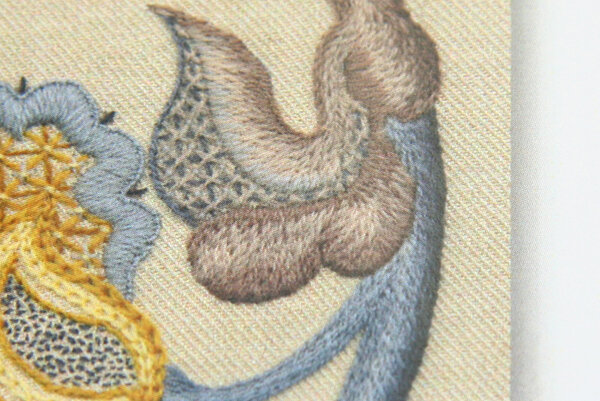
Here's what it looks like in the photo. Not even close. Not even in the ball park!
So I set the frame on the sofa so I could look at it when I was doing other things - like getting ready for dinner and writing an email to my family and all those things we do on the weekends. I looked at it, grumbled about how bad it was to Steve, glared at it, examined it and finally figured out (I hope!) what is wrong.
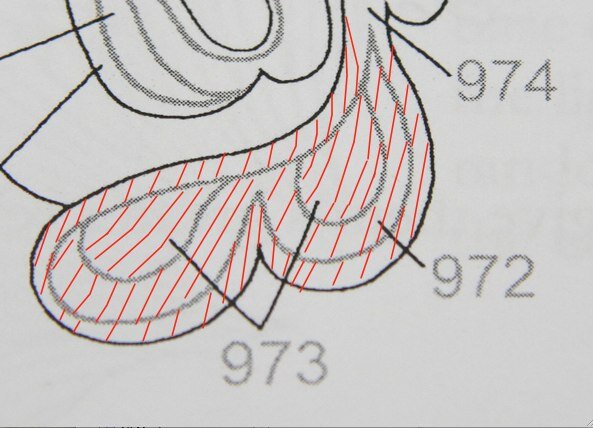
The stitch direction is all wrong. Below I've redrawn the stitch direction on both diagrams and you'll be able to see what I mean. The stitch direction on the original diagram is too perpendicular to the shape: it needs to be more at an angle.
The outside darkest shade border is too thick in most places. The inside shade isn't light enough. The shapes that are on the diagram are not quite what is in the photo. I've followed them too exactly. It almost looks like there are only two colors of thread in the photo - the darker and the lighter.
So, in addition to changing the angle of the stitches, I'll also change the shades of fawn thread I use when I redo it all. The lightest shade I've chosen is one too dark. I realize the color is quite different from the original but it works on the whole so I'm not worried about that. It's the shading and direction that are bothering me.
It's a funny shape and I'm not quite sure that I understand what I should be seeing - how the leaf folds and where the shadows are is not clear to me. So, do you think my observations are correct? What would you do to fix this?
