RSN Crewelwork Course Day 8 - Mounting
The RSN allows an entire day for mounting your finished project. Having mounted a few pieces before, I was skeptical that we would really need that much time. Well, it was close and I was still working into the evening to get my crewelwork piece mounted the RSN way.We started with a piece of hardboard that had been cut to the correct size, a piece of acid free card the same size as the hardboard and a piece of muslin larger that the hardboard. We had the hardboard cut so there would be about 2 1/2 inches around the outside edge of the embroidery when it was all mounted.We laid the muslin on the table, then the card, then the hardboard.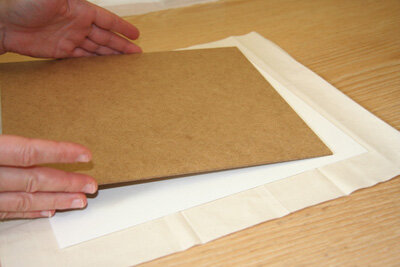 We centered everything and then onto the back of the hardboard we glued - with wood glue and only with wood glue - the piece of muslin. The card was still in between the muslin and the hardboard.
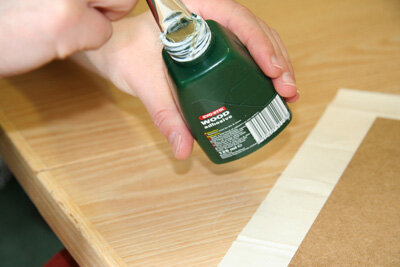 My piece of hard board was 12 x 13 inches and the muslin fabric was 14 x 15 so I had a good 2 inches to fold over the edge and glue onto the board.When gluing the fabric onto the board, you DO NOT glue it right up close to the edge of the board. Leave a gap where the muslin will be folded over but not glued to the board. There is a purpose to this - I will tell you later.
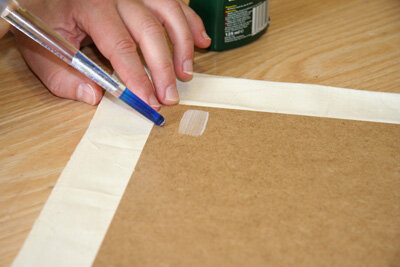 You run a paint brush width of glue about 1/2 from the outside edge of the board and glue the fabric to the board only on the edge of the fabric. (See below)
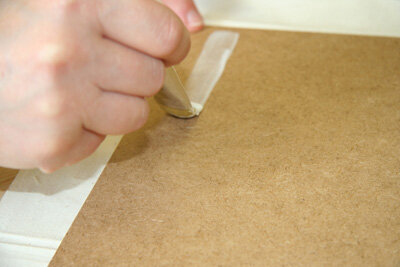 Do the two sides first and then the top and the bottom. Be sure to pull firmly so the fabric is stretched across the board.
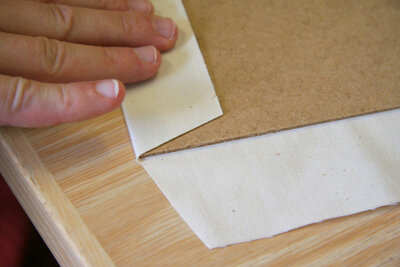
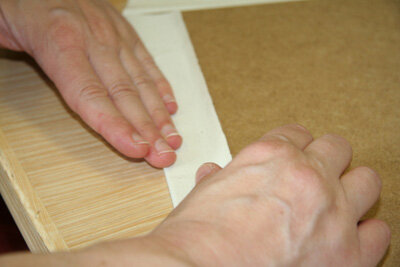 Miter the corners so you get a good, smooth fold. When you're finished with this step you will have a piece of hardboard, covered with muslin, with a piece of acid free card in between.
 Now, at this point I was so busy doing the mounting that I stopped taking photos. So I will do my best to explain what came next and show you some posed photos I took later.The next step is to place your embroidery onto the fabric covered board, making sure it's centered both left to right and top to bottom. When you're happy with the centering, take a straight pin and push it into the top edge of the board directly in the middle. Do the same on the bottom edge of the board in the middle and then the two sides.
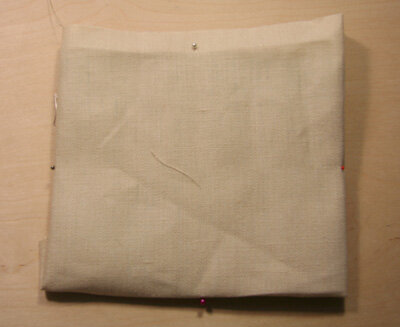 I was surprised that I could push the pins into the hardboard relatively easily. I did need to use a metal thimble to save my fingers. (My real piece was not sloppy like this photo and the fabric was pulled firmly so there were no wrinkles - remember, this is a photo I did just for this post - not the "real thing"! I guess that's obvious since this piece of twill isn't embroidered, right?)
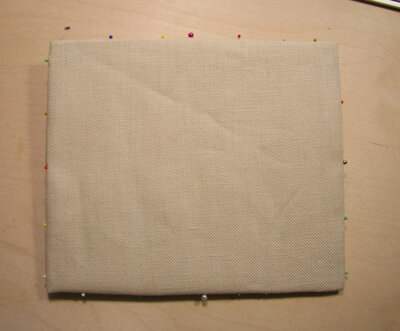 Now add more pins around all four sides until the embroidered twill is firmly pinned to the hardboard. This is exactly what I did when I mounted my RSN Sampler. (And, yes, I did go back and change the card under the fabric to acid free card later.)
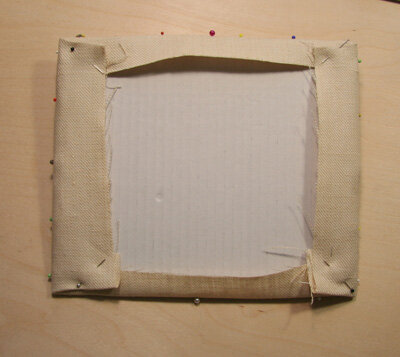 We folded the corners under and pinned them which helped to hold everything in place.
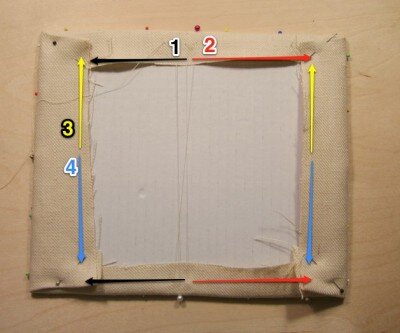
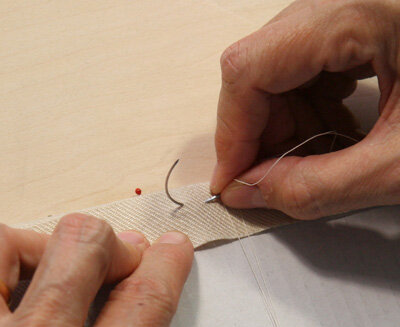 Now it was time to lace the embroidery across the back. This was the first part of the entire course I really, really didn't like doing. Really didn't like doing a LOT. I could NOT get my fingers to use the curved needle.Using heavy thread (quilting or buttonhole thread), we had to sew the twill fabric of the embroidery onto the outside edge of the muslin where it wasn't glued down to the wood. The curved needle at least made it possible to catch both the twill and the muslin underneath, but it was hard, tedious and my fingers hurt. (Yes, I know, I'm whining.)I stitched from the top middle to the top left and the top middle to the top right. Then we worked from the side middle to the top and lastly the side middle to the bottom. It's laced just as I laced my RSN Sampler except (and this is a BIG EXCEPT) the stitching goes through the muslin that's glued to the hardboard. The curved needle catches that little bit on muslin that wasn't glued down on the back of the hardboard so the embroidery is attached to the muslin not just to itself with the lacing. This makes it much stronger and far less likely to wrinkle or pucker as the years go by.
 Once the whole piece was laced on, we then attached a piece of fabric to the back. We first creased all four edges to make a nice finish and then, using that cursed curved needle again, we had to attach the fabric to the twill with an invisible stitch. That meant that the curved needle had to go into the fold of the backing fabric, through the twill and up just on the inside of the fold so no stitches were visible. It took forever!When it was all finished it looked great. It's a professional finish and I think if I practiced enough I could get more adept at using that curved needle. Maybe.At that point the whole course was finished. There was a feeling of relief, pride and that slightly deflated feeling one gets when you've accomplished something and are a bit sad it's all over. Photos were taken of our finished work and congratulations shared all around.
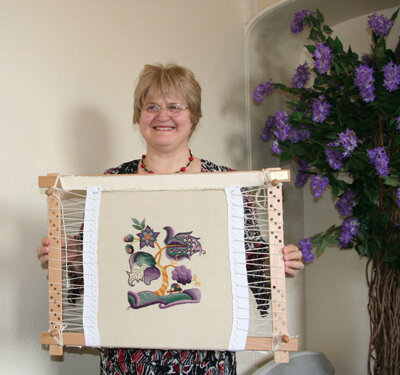 Now our crewelwork has been sent away to the assessors to be marked. We won't see them again until September at the earliest when we will get them back by post with our marks. Below is part of the document about assessment from the Certificate Course. It's optional to have your worked assessed, but no certificate will be granted to students who opt out of assessment.
______________________________
"Students are measured up against the finest embroiderers in the world and the gradings aremuch higher than other comparable courses.It is a great achievement to gain a Pass on an RSN course and this is what our tutors areaiming for you to accomplish. If you gain a Pass grade you can be assured that your work isof the appropriate standard required by the RSN.You will learn the technical and professional skills of hand embroidery and your work willdemonstrate:The selection, testing and use of appropriate materials to present ideas and solutions.Appropriate techniques, methods and processes.Effective professional skills.Self management and development of independent learning.The gradings of the final overall percentage for the RSN Certificate are:Pass 65% to 79% - this level indicates that you have demonstrated a strong application ofbasic technical and practical skills; a strong application of fundamental professional skills andevidence of developing well as an independent learner.Merit 80% to 89% - this level indicates that you have demonstrated relevant andaccomplished application of basic technical and practical skills; highly effective application offundamental professional skills and a strong ability to work independently.Distinction 90% to 100% - this level indicates that you have relevant, accomplished andfluent application of basic technical and practical skills; outstanding application ofprofessional skills and a substantial ability to work independently and reflect critically on yourown progress.The assessment process is optional.There are 4 criteria on which your work will be assessed:1. Cleanliness and Overall Appearance2. Color balance3. Variety of stitches4. Accuracy of stitches
______________________________
There was also a self assessment for us to fill out which included a place for us to discuss the inspiration for our design. Here's what I wrote:"Design Development Ideas:Studying as many photographs and patterns of crewel work as I could find helped me to decide on the design I brought with me to the course. The internet is helpful but the real gold mine has been the old books in my library.There are four books in particular that have been helpful. Two of the books, Crewel Embroidery by Erica Wilson and The Art of Crewel Embroidery by Mildred J. Davis, belonged to a member of my family and I treasure them all the more because of that. Each book is the perfect combination of history, photos of completed crewel work, stitches and ideas for original designs. The V&A Textile Collection Embroidery in Britain 1200 - 1750 provided design and color inspiration, specifically the plate on page 84 of the Detail from a Curtain first half of the 18th century Cat. # T.181-1962 . The Royal School of Needlework Embroidery Techniques plate on pages 54 - 55 from the RSN collection also guided me in color choices. Both of these pieces use deep greens and gold or rusty browns. The pieces seem to glow with the late afternoon sun on the deep green of the trees.Each of the four main elements of the design are heraldic symbols and are a reflection of the traditions of my family and family home, which lies in an oak wood where deer are seen often.Acorns - antiquity and strengthPomegranate - abundance and fertilityAcanthus Leaf - admiration of the artsStag - one who will not fight unless provoked - peace and harmonyThe design I brought to the course was very similar to my final design. The angle of the Tree of Life in relation to the deer and hillocks was too steep and my tutor helped me to realign all the elements to make the design more balanced."So now, I just have to wait for my marks. I feel like a student again!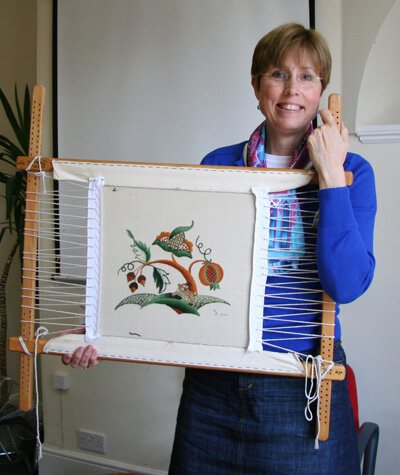 Next time I answer Coral Sea's question “What was the single most valuable thing that you learnt from the course?”