RSN Crewelwork Course Day 7 - my sweet Deer
Long and short shading is a technique I had to learn to do a bit differently in order to be successful stitching the little deer in my piece. I began by stitching the first row in a longish stitch - filling about 1/3 - 1/2 of the shape with the first row as I did on a leaf shape. I then moved on to the second row using a lighter shade of wool and it looked just terrible. Amateurish, childish in the worst possible way and I was so devastated (it was the very last day and I was in a panic to finish!) that I didn't even think to take any photos to show you how terrible it really, really was. I took a deep breath and Nicola sent me off for a cup of tea. When I came back we worked together on fixing the mess. We changed colors, using a less dark shade for the first row so they shades were closer and - most importantly - I made much shorter stitches. Trying to make stitching look like animal fur is tricky and too often the stitches aren't short enough. The advantage to making short stitches is that's is easier to move the direction of the stitching around to mimic the shape of the animal.
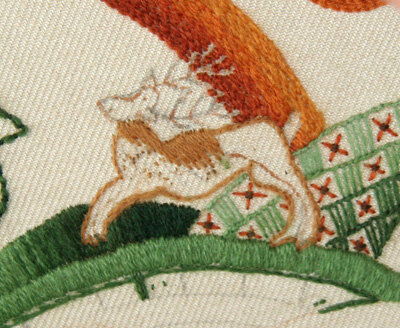
 Nicola got me started and, you can see from the stitches above, the direction of the stitches mimics the direction that the fur would lay on the deer. The bottom of the line of stitches follows the curved shape of the bottom of the deer.
 I worked the stitches to the very back end of the deer but not forward since the breast needed be be a much lighter color.
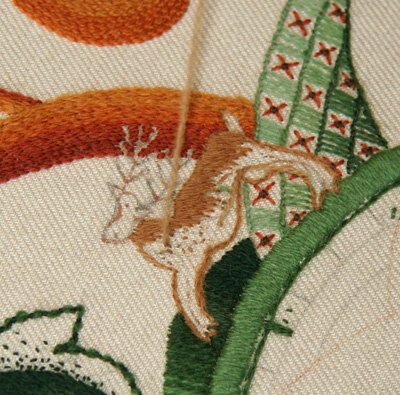
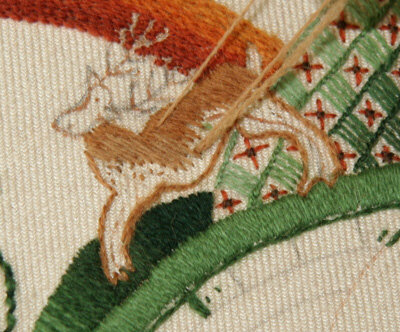
 Adding the second color I went very deep into the first row with some of the stitches. You can see that the second row covers 3/4 of the first row in some places.The bottom end of the stitches still follows the shape of the deer's underside.
 After the second row was finished I added a third in an even lighter brown and then a bit of ivory for the belly. Finally I stitched the first, darkest color on the very bottom of the deer. Then I went back and added some stitches to blend the colors better where they looked rough.
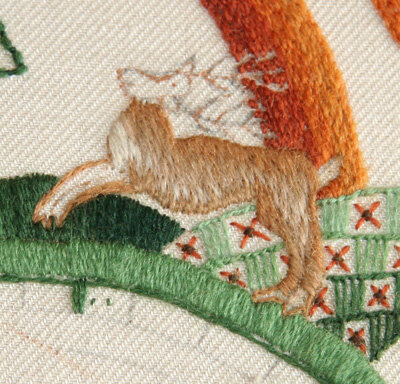
 The bottom of the legs was done in short satin stitches, changing color to a darker shade toward the bottom of each leg. You can see in the photo below that the front leg is stitched in a lighter shade than the back leg. This helps bring the front leg forward so it has depth.
 The stitches overlap one another leaving very short sections of each stitch showing after the stitch below is added. This is what adds the wonderful, furry texture. The only longish stitches are on the breast of the deer where we wanted his fur to look smoother than the rest. I did a lot of shading, using the same shade of thread in more than one row to blend the colors together.One thing I'm so proud of is my decision to use two little bullion knots for each of the front hooves - they look like cloven hooves and I just love them!When it was finished, everyone in the workroom was complimentary about how it turned out and I was so relieved! Crisis averted and piece finished!
